Capture Peak Garden Now with Your Phone
Garden photos: tips & mistakes to avoid

Dear Yardener,
Is your yard looking fabulous?! Mine is, but I’m still working on capturing the profuse blooms in a photograph worth sharing with you.
I am not someone who likes documenting my life, so my phone camera is mostly filled with practical images, like my airport parking location and the label on our water filter. But I am trying hard to take better garden pictures — and I hope you will, too — because sharing images of beautiful native gardens helps me achieve my mission of spreading joy and bolstering biodiversity with well designed native plant gardens.
Photography is also a design tool. Capturing a still image helps us see our gardens more objectively and to judge what tweaks will improve it: Does it need more contrast in shape, texture, or color? (Looking at a black and white version is especially useful.) Or OMG! I had no idea my pile of hoses looked so hideous! In addition, photographs allow us to see progress over time. This is especially helpful when we’re disappointed in them and need to remind ourselves how far we’ve come.
To improve my garden photographs, I read renowned British garden photographer Jason Ingram's book, How to Photograph Gardens: Beautiful Images Made Simple. It turns out I’ve been doing it all wrong! If you have a serious camera, I recommend reading the book to learn about lenses, depth of focus, differential focusing, negative space, studio photography, adjustments and processing. For the rest of us, here tips for photographing gardens with a phone.
Don’t: Shoot at noon on a sunny day.
Do: Shoot early or late or when it’s cloudy.
Bright sunlight is harsh, simultaneously flattening textures and shedding deep shadows. (Do you find yourself trying to get out of your own shadow’s way?) Ingram recommends shooting in the first or, especially in autumn, the last light of day. Midday can also offer attractive, soft light when there is high cloud cover.
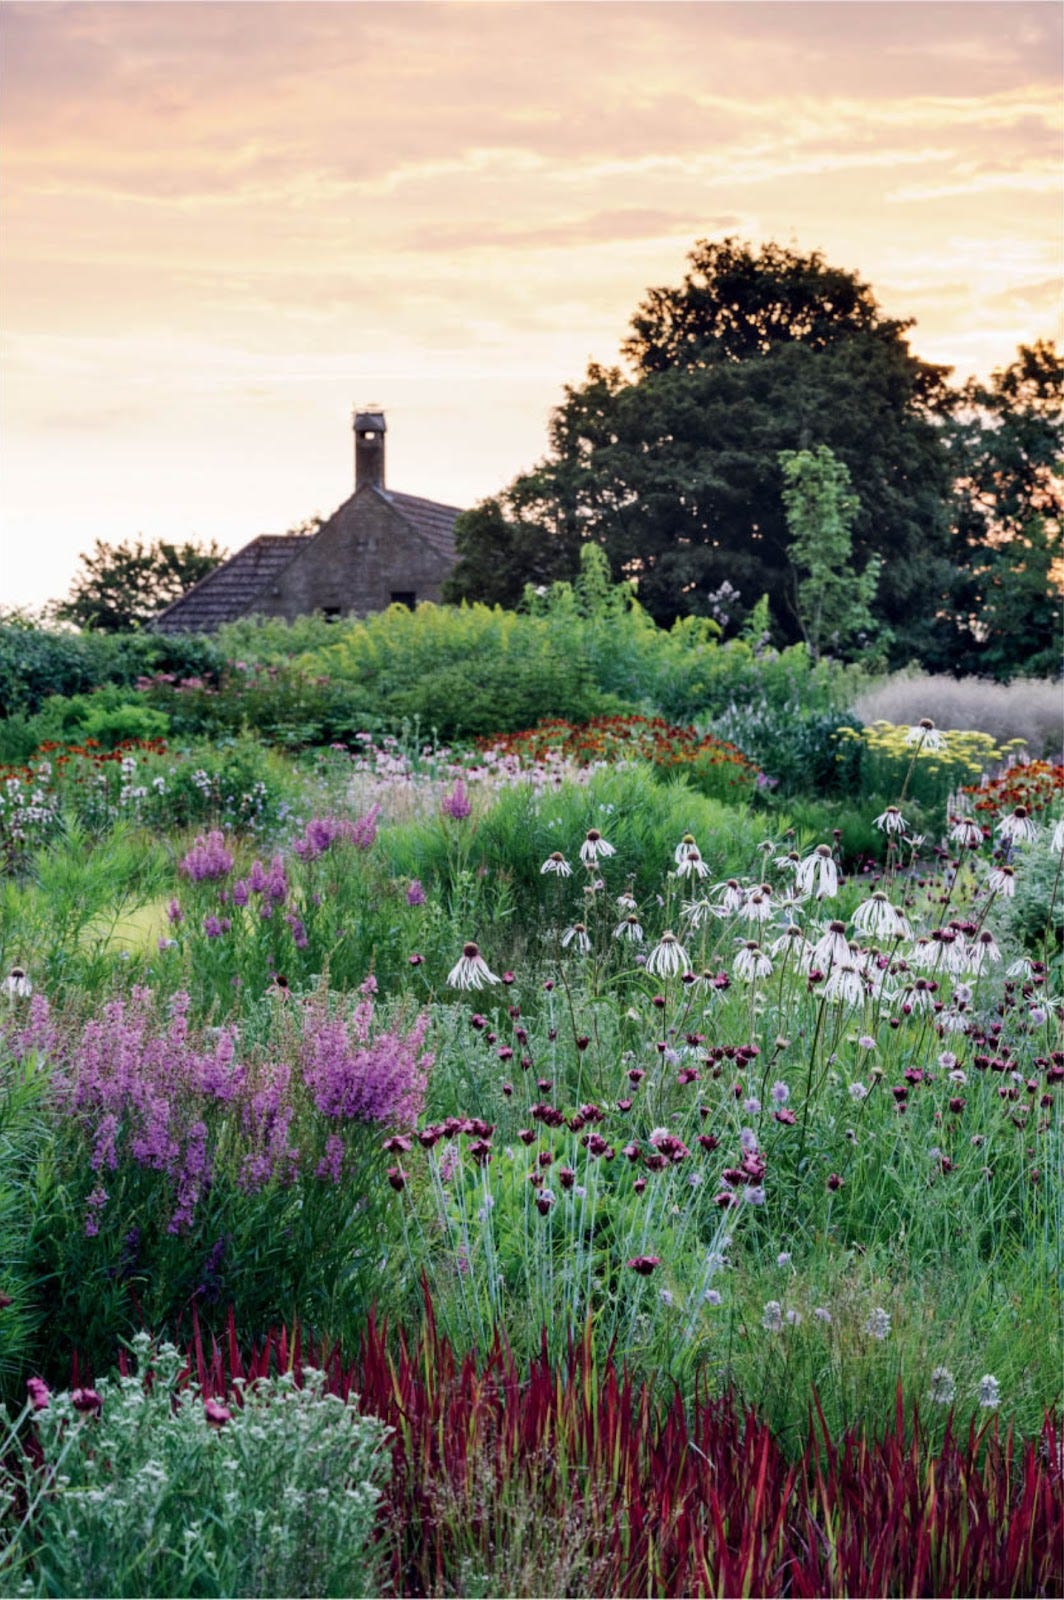
There is no getting away from it: the best light happens shortly after sunrise. This is the ‘golden hour’, and in the summer months — certainly in the UK — you need to be prepared and set up for about 4.30am. It may be early, but the results are worth it, as the light is golden, soft and full of detail. — How to Photograph Gardens
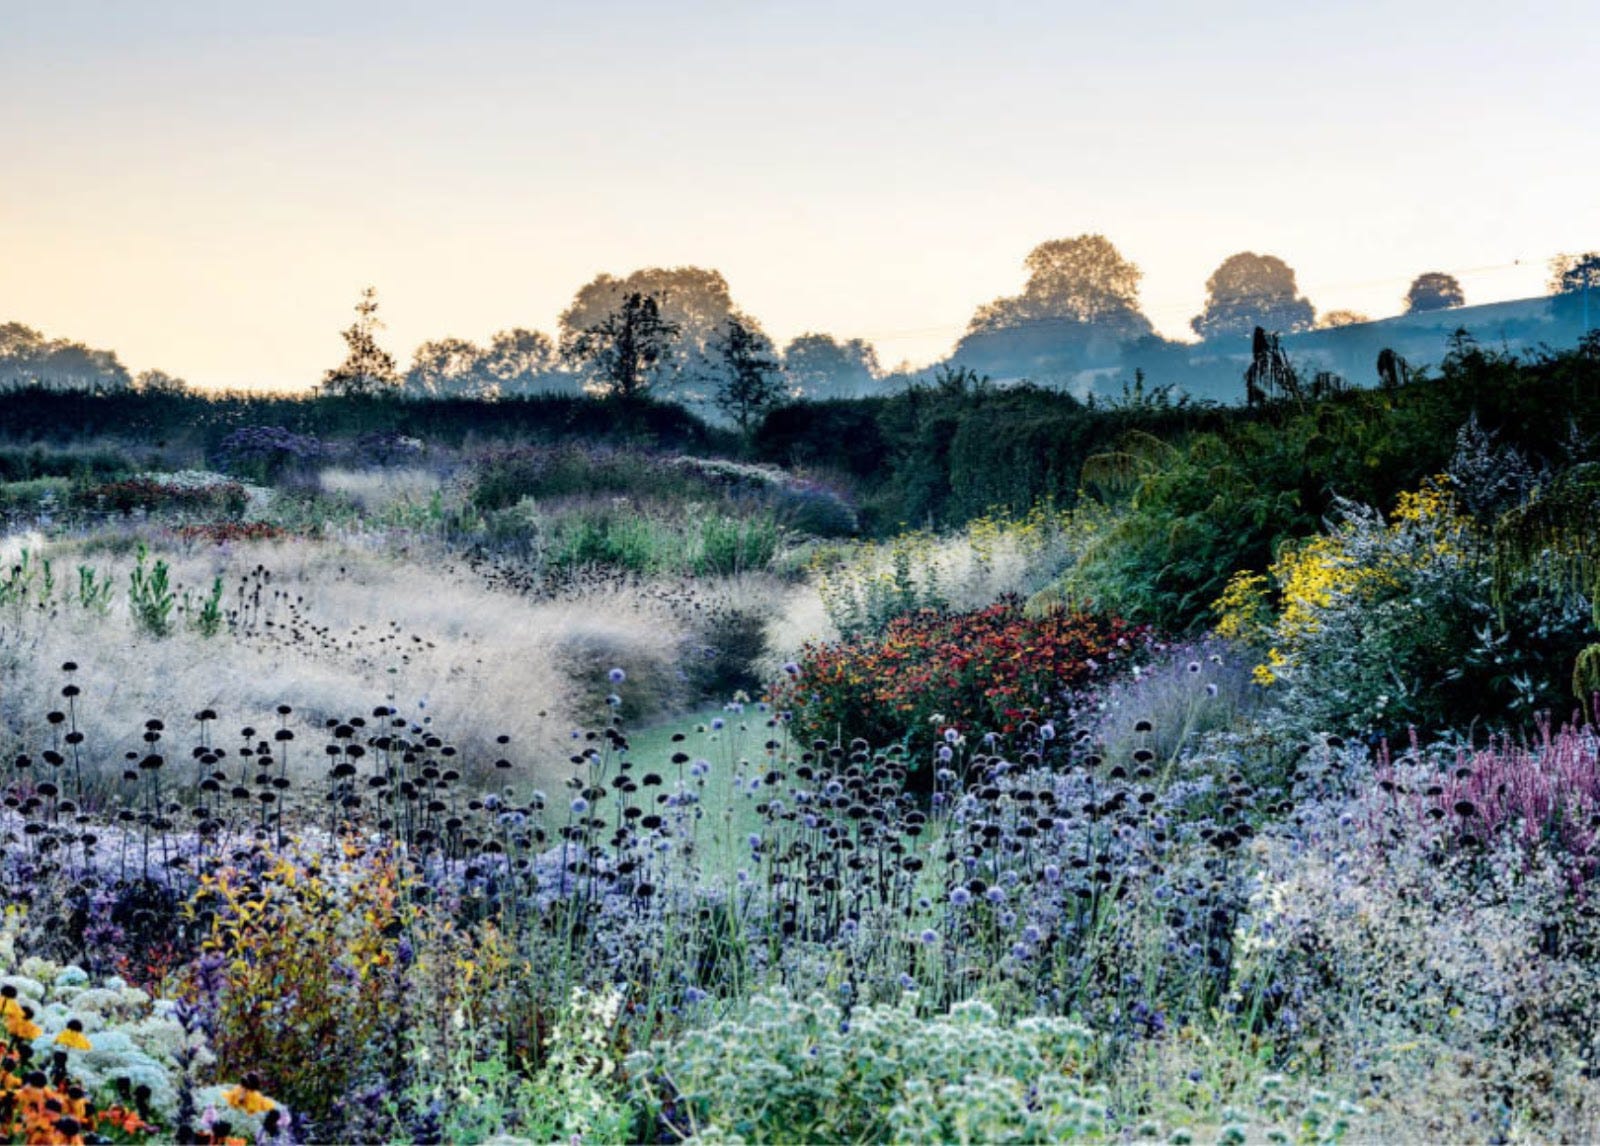
While sunrise and sunset bathe the garden in warm light, cloudy days, as well as the time just before sunrise or after sunset feature cool light — with bluish shadows. This is effective for gardens with cool (e.g., blue and purple) flowers.
It often occurs on overcast days, in the shadows of a garden or during the transitional period known as the ‘blue hour,’ just before sunrise and after sunset. Shooting in snowy or frosty conditions can also produce a beautiful winter landscape with soft, diffused cooler light. This type of light offers you the unique opportunity to capture scenes with a cooler colour palette, creating a serene and sometimes ethereal ambiance in your images. — How to Photograph Gardens
Don’t: Expect to capture your garden in one perfect pic.
Do: Think like a pro and aim for specific shot types.
When Ingram wants to capture a garden, he imagines the resulting magazine spread, with three types of images:
Openers encapsulate the essence of the garden in a single frame (think a double-page magazine spread). In terms of conveying garden design, this is the most important and most difficult image type. Openers are often best captured using a wide angle lens — i.e., using a zoom of less than 1x. (The maximum wide angle on my iPhone 16 Pro Max is 0.5x, for example.) Taking pictures from above, even just raising your phone above your head, is another way to capture the overall structure of a garden.
Ingram aims to capture two or three opener images at each garden he shoots. What are the two or three overall images that will best capture your garden?
Wide-angle shots are excellent for contextualizing elements within the garden, such as architectural structures, pathways or the surrounding landscape. They provide viewers with a sense of place and help convey the overall atmosphere of the garden environment. — How to Photograph Gardens
Midrange shots showcase planting combinations and vignettes, like how a plant or group of plants fits into the garden. Ingram aims to capture eight to 10 different midrange shots in a single garden. I’m finding midrange shots are where my phone’s optical zoom comes in handy. (It’s important to know your phone’s maximum optical zoom and to shoot at that level or below. Beyond your maximum optical zoom, digital zoom kicks in, reducing image quality; you can always achieve the same result when you edit, if you want.)
Plant portraits reveal the beauty of individual plants. Ingram hopes to take about a dozen plant portraits in each garden. Although people love them on social media, I find plant portraits least interesting — after all, I can generally find someone else’s portrait of any plant — but I am enjoying experimenting with Apple’s “portrait” setting, which creates a shallow depth of field, keeping the plant in sharp focus while blurring the background.
Don’t: Put the sun behind you (as you were taught).
Do: Shoot into the light.
This is the game changer. I imagine many of you were taught, as I was, to put the sun behind you so it’s shining on your subjects so their faces aren’t in shadow. This is OK for portraits, but does not convey the atmosphere of an overall garden — and often throws your own shadow into the image. Instead, photograph with the sun in front of or beside you. Do not look directly into the sun yourself, however; this can damage your eyes.
Here’s how Ingram explains the benefit of backlighting gardens:
Deliberately position your camera so that your subject is backlit, with the light source directly behind or slightly to the side of it. This positioning may be challenging at first, as the smallest camera movement can make a big difference. You might also have to reposition yourself to make sure there is some foliage or tree branches diffusing the light, which will help reduce lens flare while adding a nice silhouette effect. A wide-angle lens is often best for this type of shot, as you can fit a lot of detail into the frame. — How to Photograph Gardens
Don’t: Center the most interesting element.
Do: Use leading lines and the rule of thirds.
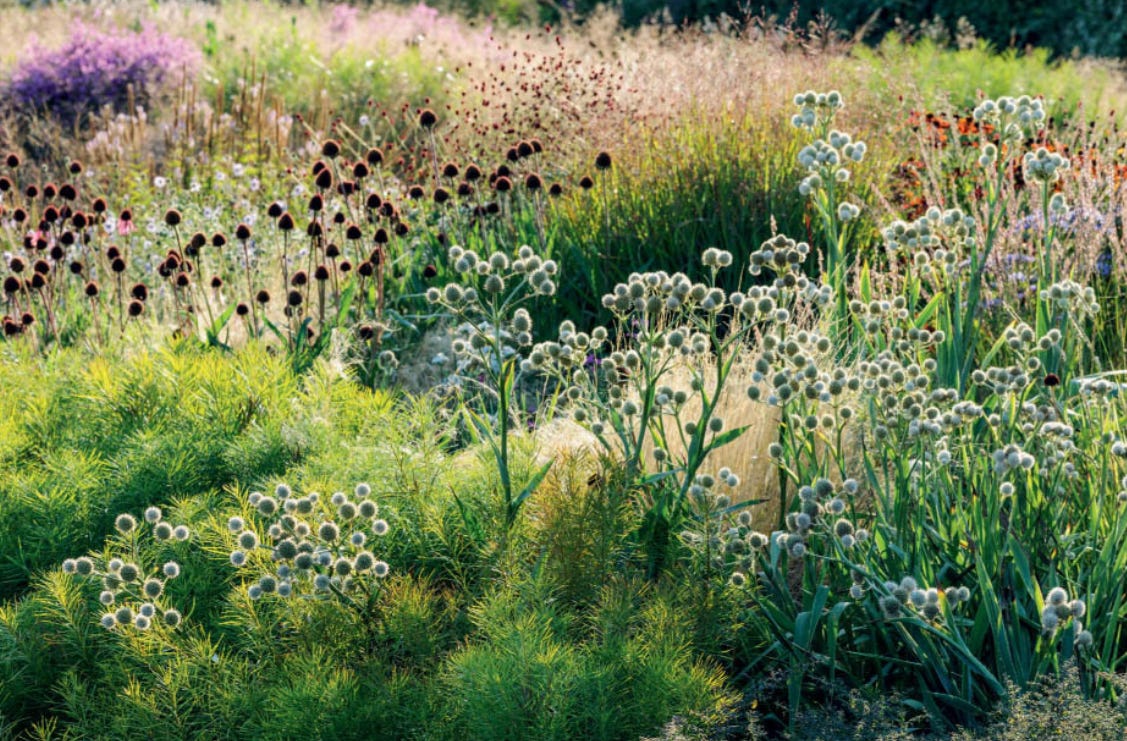
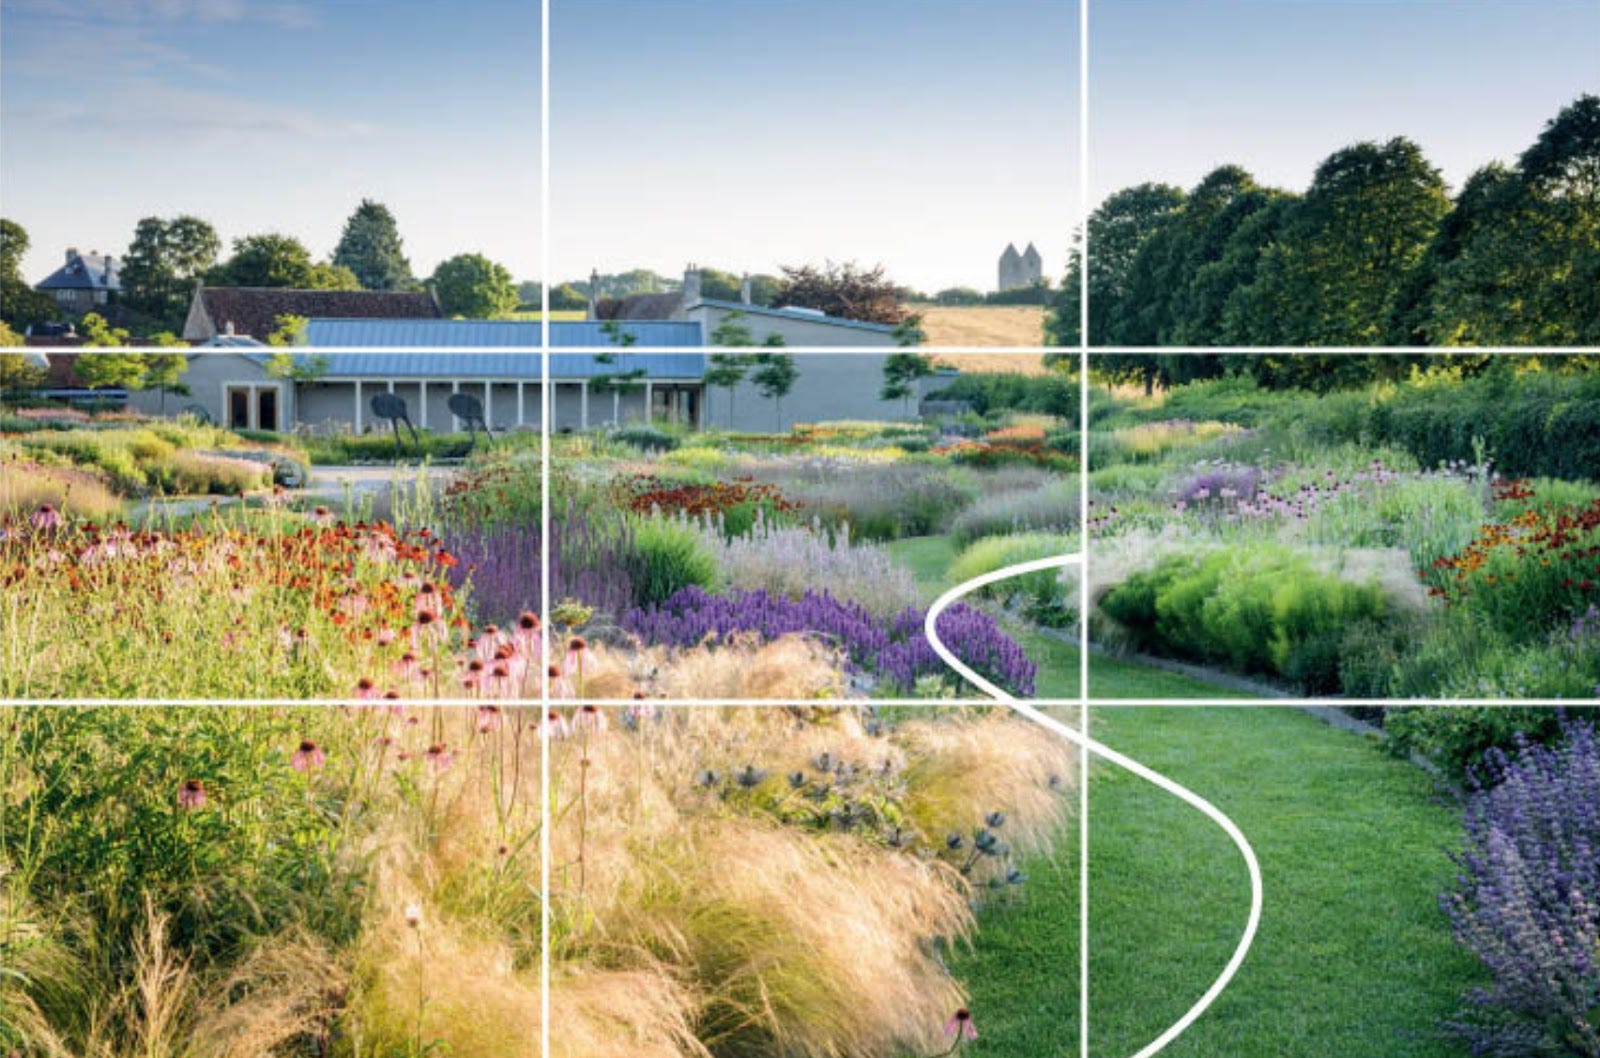
Composition is where practice comes in. In fact, I challenge you to take a picture that incorporates both leading lines — a path, row of trees, or stone wall, for example — and the rule of thirds — i.e., putting interesting elements in the first or last third of your image, vertically or horizontally, rather than in the middle. (See Ingram’s example below.)
More fully, here is how Ingram describes these two compositional tools:
A leading line is a compositional element that guides the viewer’s eye through the image, creating a pathway that leads to the focal point. Leading lines can be straight or curved and can be found in many forms, such as paths, rows of trees or plants, walls, fences and waterways. When you first start looking for leading lines, focus on strong diagonals and dominant shapes. As you train your eye, identifying these lines will become second nature and significantly enhance your photographic vision. …
The rule of thirds is a fundamental guideline in photography that involves dividing an image into nine equal parts using two equally spaced horizontal lines and two equally spaced vertical lines. The key elements of interest in the composition are then placed along these lines or at their intersections, rather than in the centre of the frame. This technique creates a more dynamic and visually appealing composition by guiding the viewer’s eye and adding balance and interest to the image. — How to Photograph Gardens
Don’t: Wait to view later.
Do: Try various angles, check images after each; practice selective composition.
As I mentioned, when you look at something in a still photograph, you often notice things not seen with the naked eye. So check your camera to see what you’re capturing and move your position (or the offending hose) to get a better image. And retake each picture from various perspectives.
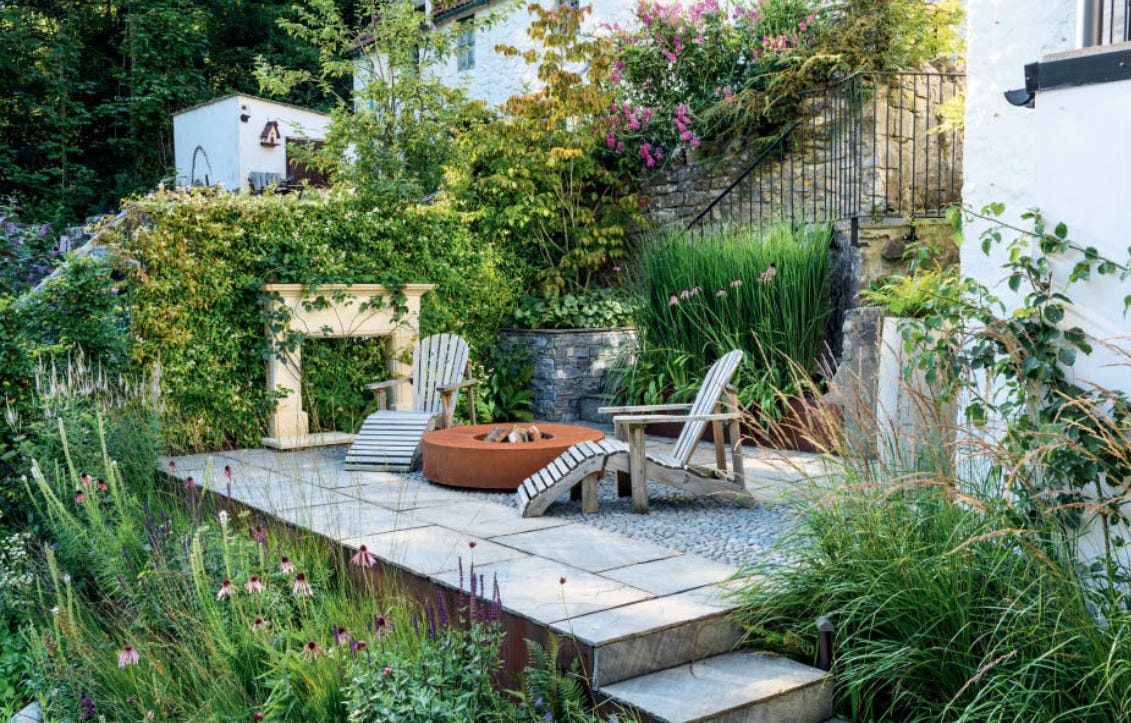
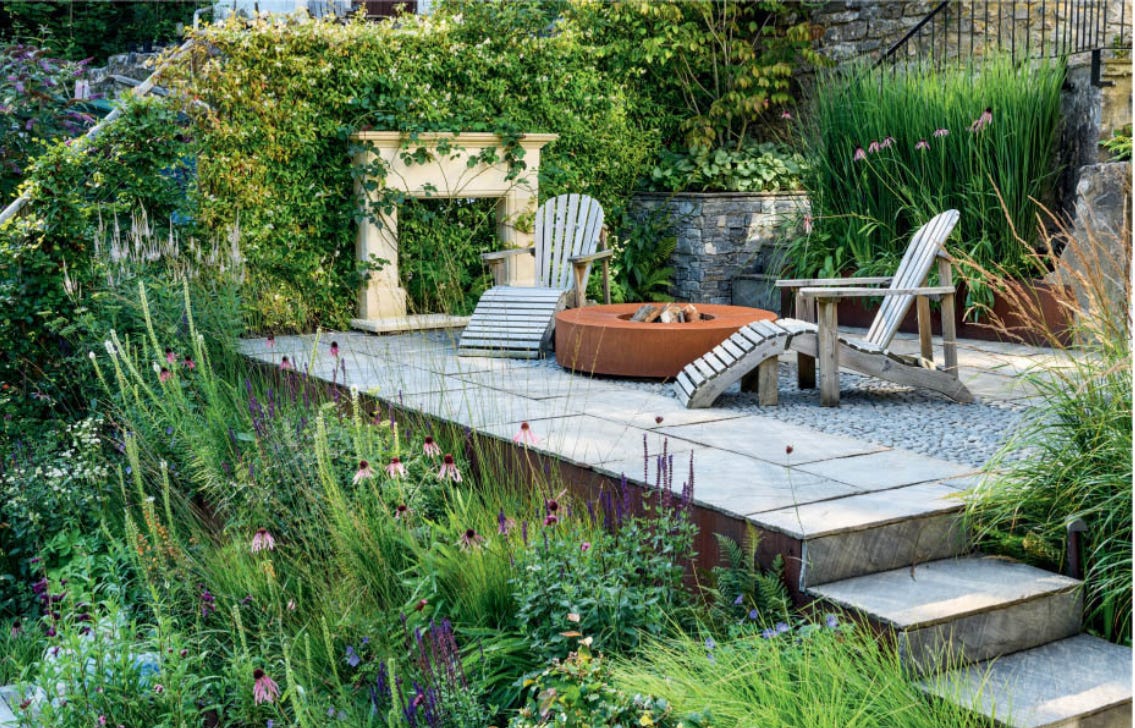
Similarly, when capturing garden designs or landscaping features, selective composition allows you to emphasize the thoughtful arrangement and layout. Concentrating on specific design elements, such as a beautifully arranged flower bed or a meticulously designed water feature, helps to convey the garden’s aesthetic vision more clearly.
In the images here, I had to decide what to exclude from my composition to make the first image work a little harder. I did this by zooming in to exclude the white wall of the house at the right, while still keeping the framing with the grasses to produce the second image. Although it would have been possible to crop the original image during processing, I prefer to keep the full resolution of the frame and achieve the desired look and feel in camera. — How to Photograph Gardens
Ingram recommends waiting to select and edit your images until you can see them on a larger screen. While I’m learning the composition tools, I’m finding it helpful to mark up my photos in a larger format (I use my iPad) to check my use of leading lines and the rule of thirds and see how I might improve them.
Extra credit: More tricks to try
Additional bits of wisdom from Ingram’s book:
Incorporating obvious hard landscaping elements can add further depth and visual interest to the scene, helping to guide the viewer’s eye through your image. …
Identify symmetrical arrangements or repeated patterns in plantings, such as rows of identical plants or mirrored compositions. These elements contribute to the overall sense of balance and harmony in a garden, and will create visual interest and rhythm in a photograph. …
It’s worth looking out for a ‘frame within a frame’, such as a doorway, archway, branches or other elements that naturally create a framing effect. …
Smaller gardens offer fascinating shapes and patterns to work with. These may be found in the materials used, the placement of furniture and the arrangement of plants. Spend time exploring these elements from different angles. Don’t hesitate to look down or shoot from a height. — How to Photograph Gardens [bolding mine]
Finally, keep your lens clean.
And please share your pictures with me!
— Heather
Eco landscaping news
The Boston Globe reports an increase in tick bites in New England this year. Learn how biodiversity mitigates ticks – and how to create an anti-tick border.
I love this guy! Read the New York Times’ profile of Alabaman Karl Lybarger, an eco-activist I’ve been following for years.
The Lybarger article is from the Times’ series 50 States, 50 Fixes. See what environmental solution is working in your state.