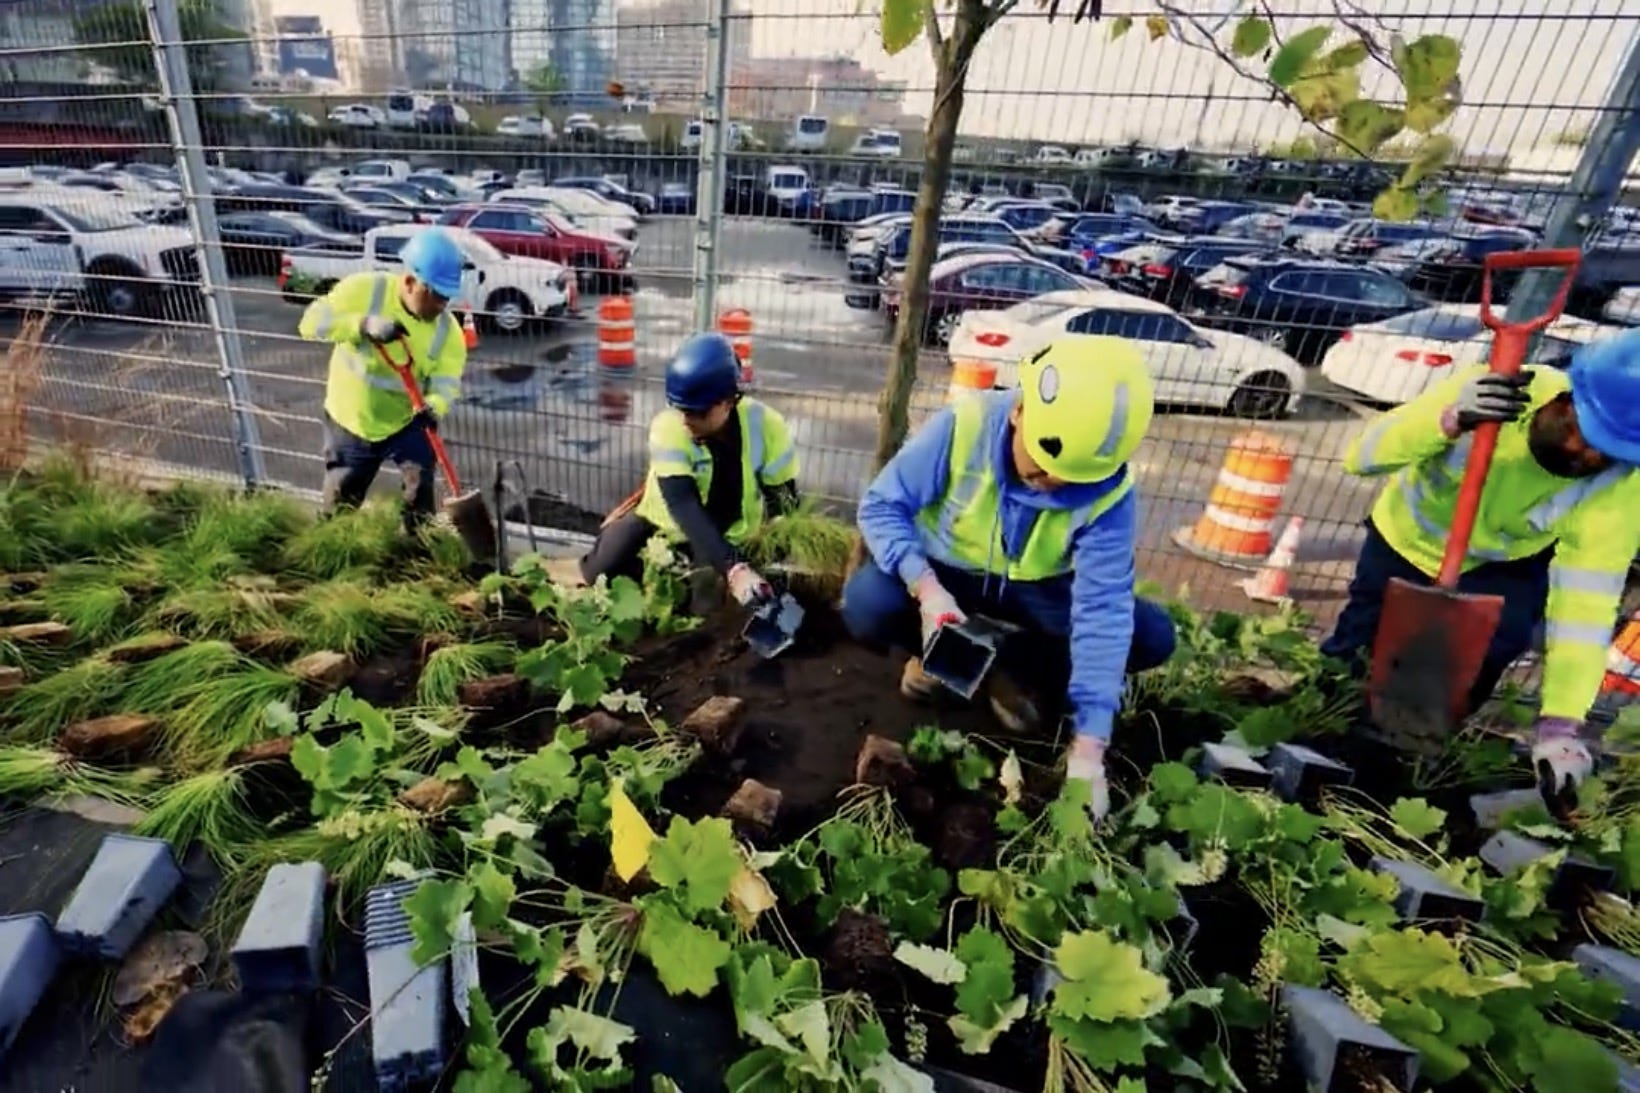
Dear Superb Subscriber,
When I saw the above image of plants being installed at New York’s High Line according to Piet Oudolf’s designs, I was struck by the density—yet again. They are installing about one perennial per square foot, which is what I recommend to you. Unfortunately, when it comes to my own plantings, I often can’t quite bring myself to buy the number of plants this density requires. It’s so expensive! And installing them is a lot of work! Eventually, the plants fill in, but the space between them invites invasives, creating removal work in the meantime.
This fall, I’m experimenting with various ways to make planting densely more affordable including growing plants from seed, propagating from hardwood cuttings (see below), and direct seeding. How are you achieving the density required for the knit-together look and function of an ecological landscape? I’d also love to hear from readers in desert ecoregions, where plants are naturally sparser, how you view density. Please tell me in the comments. In the meantime, you can read about the latest High Line planting in The New York Times [gift link].
Happy fall planting!
—Heather
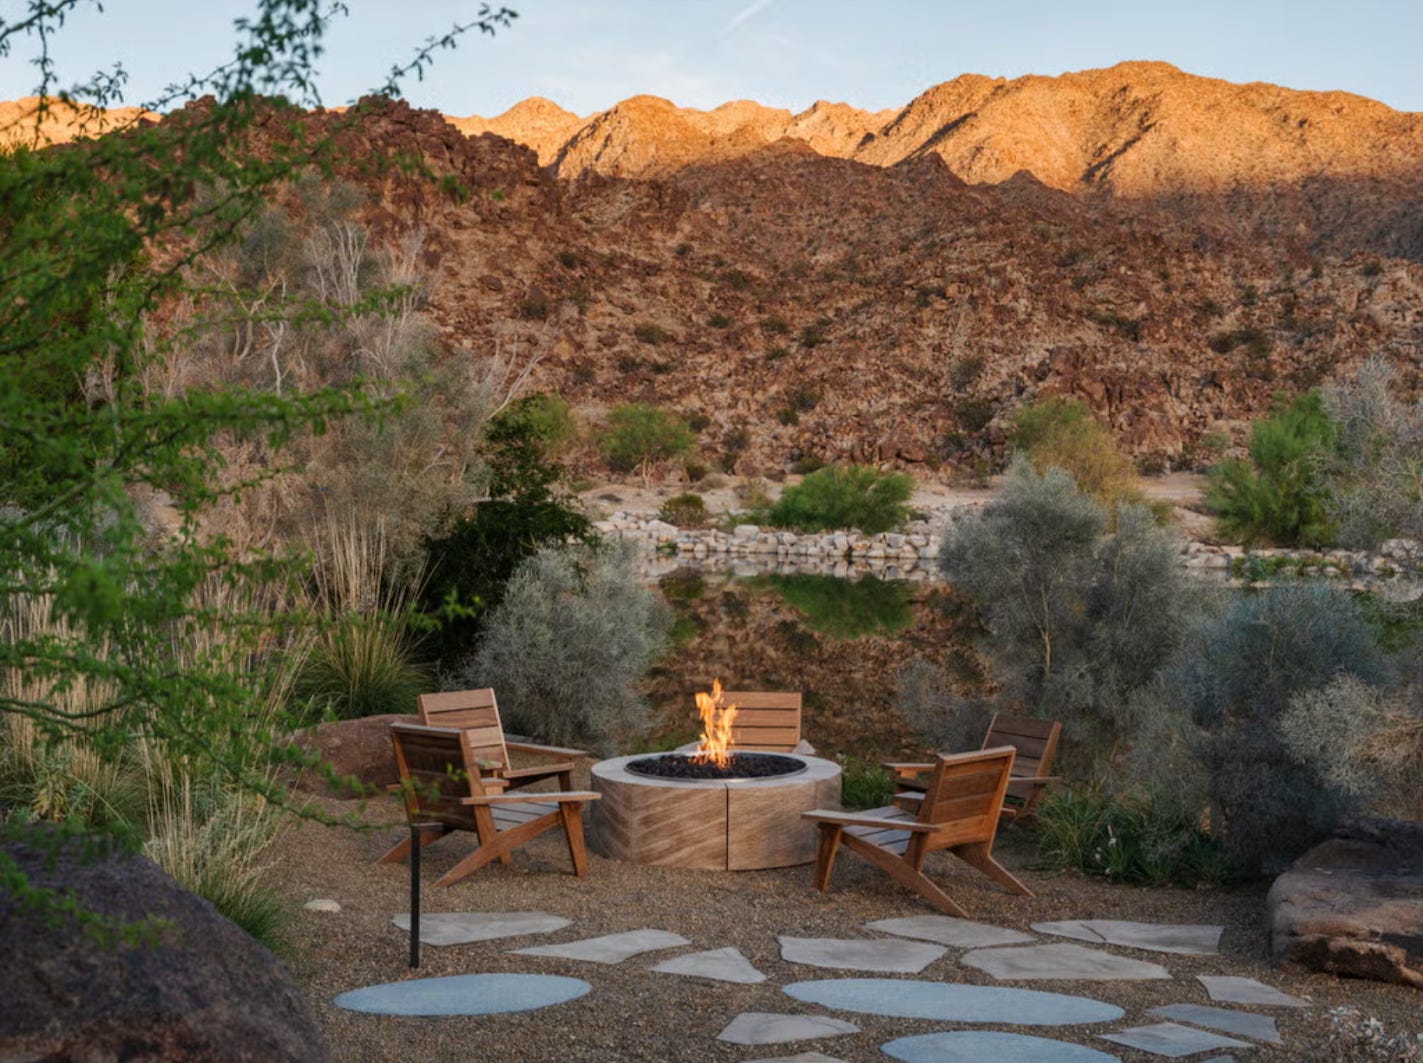
Dear Design Your Wild, Any elegant solutions for hiding recycling and trash cans? :) We don’t have a backyard location suitable. I’ve tried an olive tree in a large pot in front of them. I need something evergreen.—Bridget, South Carolina
You can’t make a silk purse out of a sow’s ear, as the saying goes. Unfortunately, that’s what most online solutions to hiding trash cans try to do. Large enclosures, planters, and complex plant arrangements draw attention to the bins, rather than minimizing them. That’s what I imagine your olive tree in a large pot probably did, despite being lovely on its own.
Good South Carolina native evergreen options to plant in the ground to hide your trash cans include wax myrtle (Morella cerifera) for sun and part shade and catawba rhododendron (Rhododendron catawbiense) for shade. Both can be cut back severely every few years, if necessary, to encourage fullness and maintain their size. (If you’re concerned about size, read the recent Gardens Illustrated article, Don’t Plant Small Plants in a Small Garden.) If your space is very small, an option is to install a trellis and cover it with evergreen coral honeysuckle vine (Lonicera sempervirens). Unlike exotic olive trees, these native alternatives host butterflies like the red-banded hairstreak (wax myrtle) and spring azure (honeysuckle).
A note on placement: Experiment with where to place the bins to be least noticeable but still accessible. That’s often away from the house, perhaps to the side of the driveway or path. In fact, sometimes the least prominent location is behind some shrubs at the front of the lot, where you pass it quickly on your way to your door.
P.S. For those of you who prefer an enclosure, here is a simple DIY version that can be built of cedar or pressure treated lumber and left to weather to a natural grey. Unfortunately, ready-made items from unfinished lumber are difficult to find at reasonable prices.
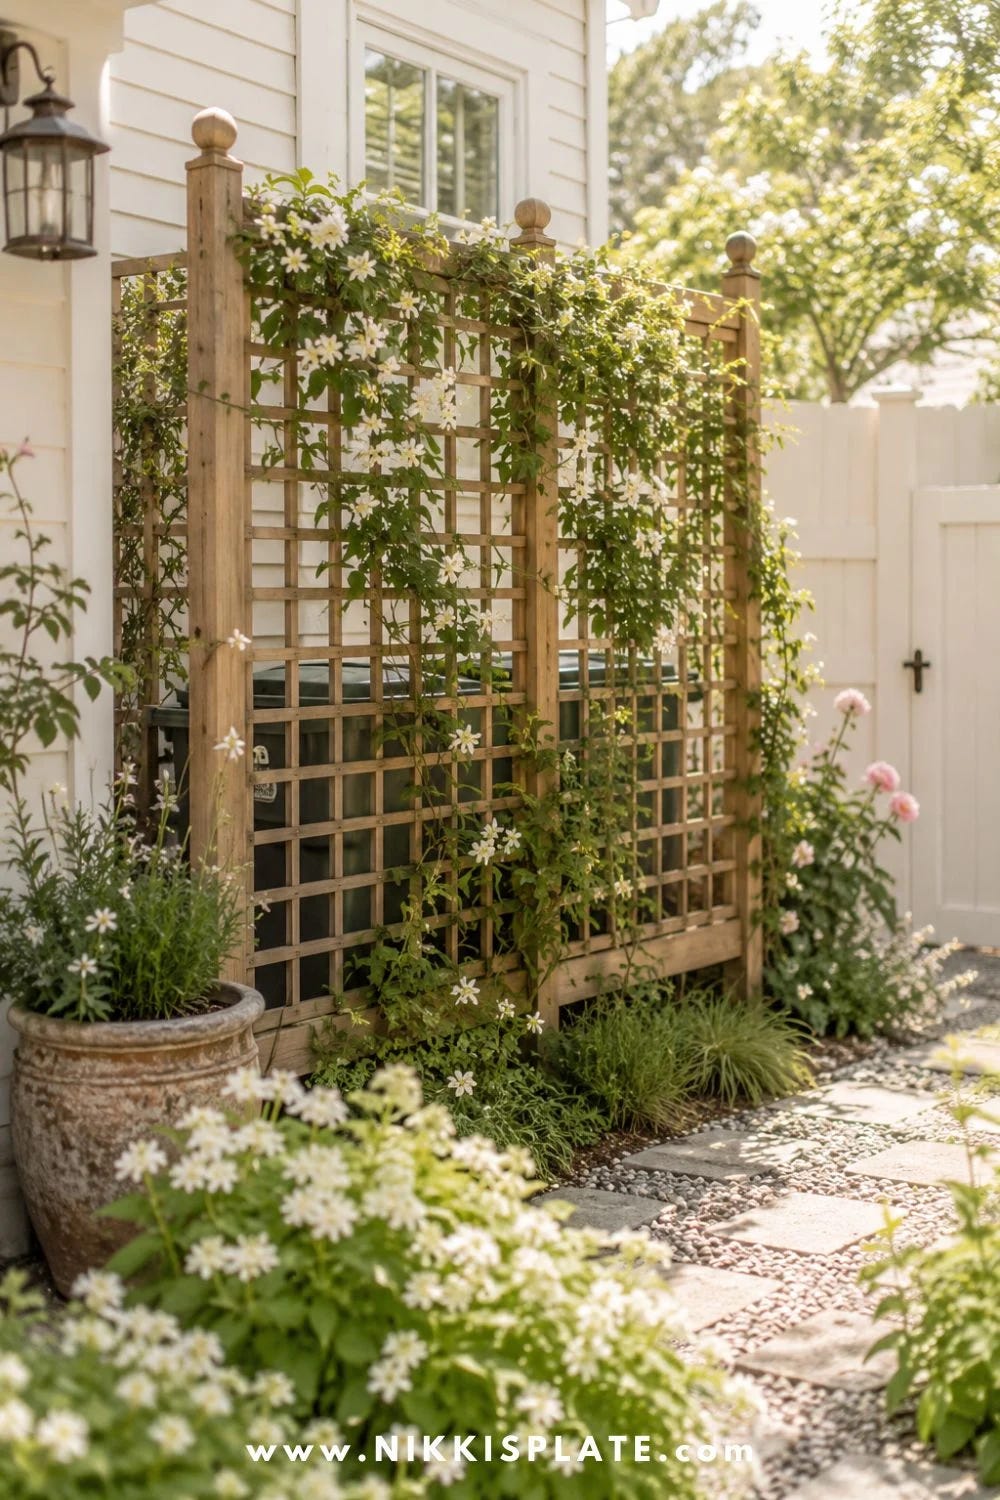
Dear Design Your Wild, Do you edge the paths? With what? I like pea gravel and grass paths.—Workshop Participant
Edges are indeed powerful design elements, as well as cues to care, distinguishing gardens from wild places. However, the contrast between the path and the bed is the most powerful edge. There’s often no need to dress up this true edge with edging. If you want to emphasize the edge, first consider outlining a bed with a species that will stay in place, which could be anything from a perennial groundcover like woodland stonecrop to a dwarf evergreen shrub like ‘Gem Box’ inkberry holly.
If you prefer a crisp, formal look, choose edging in a natural material consistent with your yardenality—cobblestone for Courtyard Chic, natural stone for A Walk in the Park, terra cotta or concrete for California Dreaming, or brick for Blooming Romantic. These can be raised to keep gravel in place or sunk to ground level alongside grass paths so you can mow right over them and avoid having to use a trimmer.
If your yardenality is Prairie Modern, consider cement pavers or Corten steel (pre-rusted). Shelby Radcliffe of Gainesville’s Emergent Gardens recommends this reasonably priced Corten edging and recommends buying eight-inch edging and sinking it five inches below the soil line to deter aggressive grasses (e.g., Bermuda, torpedo) from invading your beds.
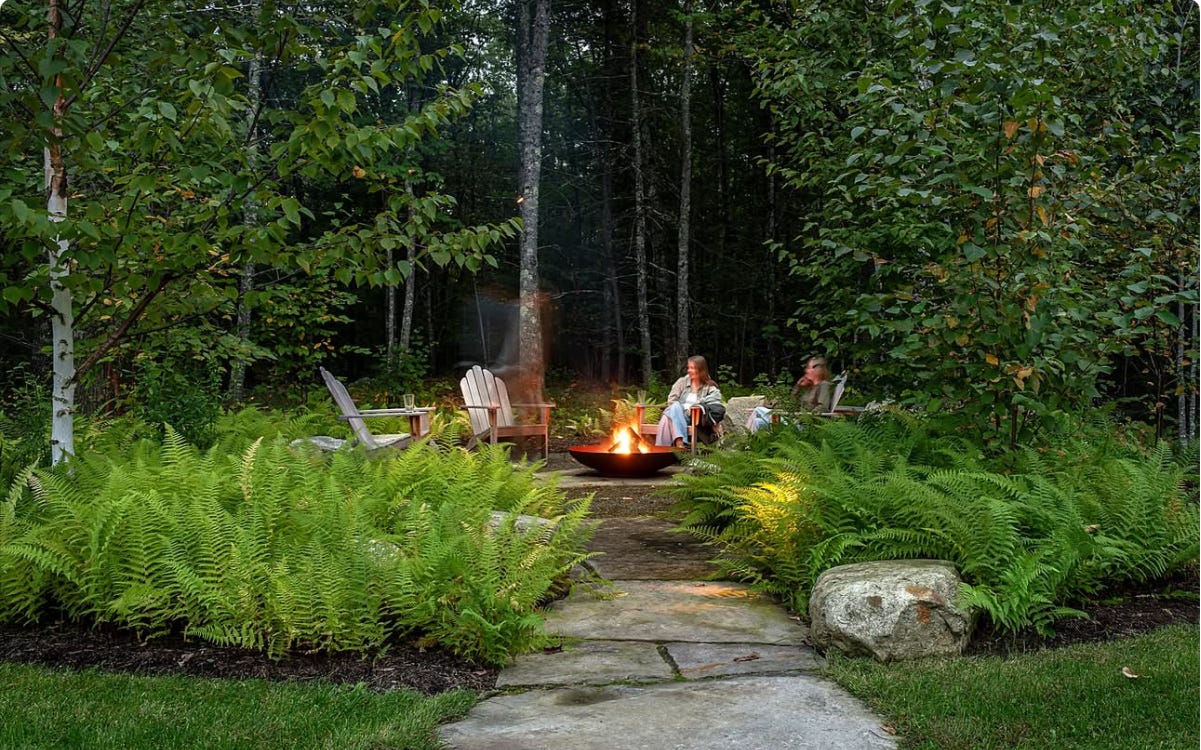
With grass paths, you may want to create temporary edging from branches or rocks to show where to mow and to underscore the intentionality of your plantings while they establish. Later, you’ll be able to avoid string trimming by removing them and keeping a neatly mown edge.
For more ideas, see our Pinterest board of hardscape and edge solutions.
Why, How, Wow!
Why? To avert mass extinction, really
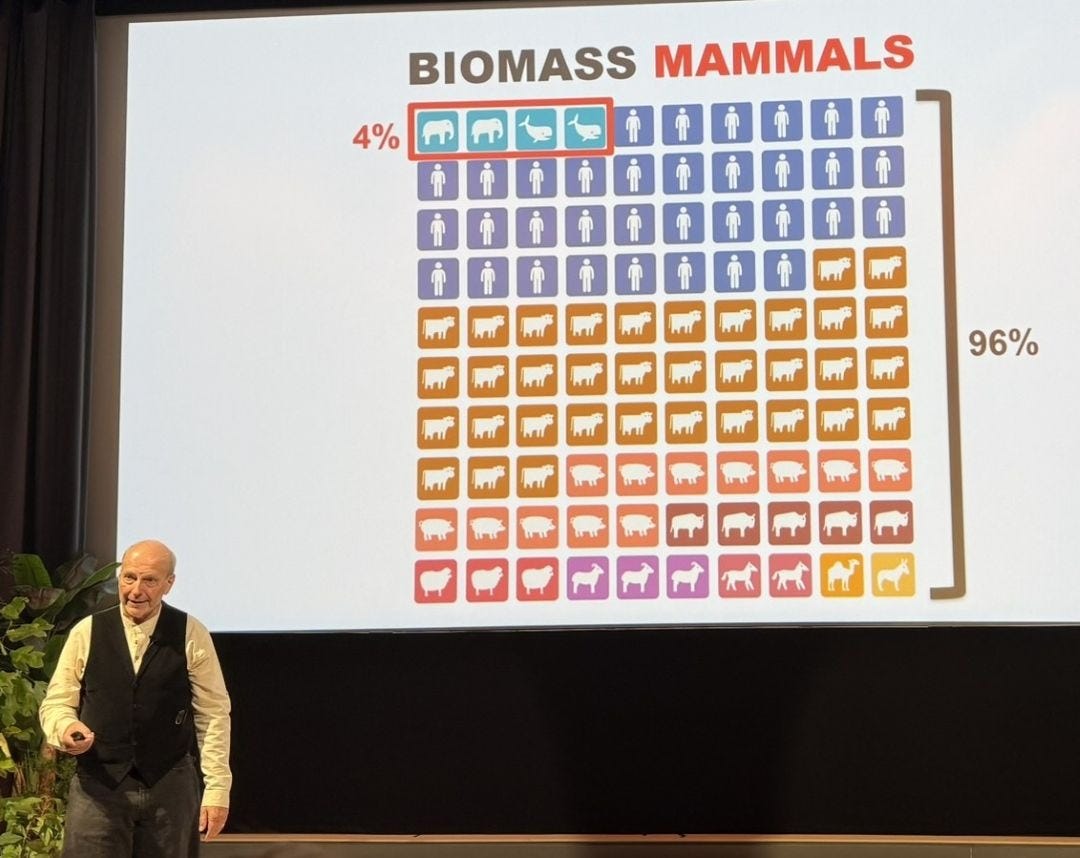
Last month, I attended The Age of Stewardship: A Rewilding Symposium, hosted by Wildr Places and emceed by my daughter Zoe at the Edelman Fossil Park & Museum outside of Philadelphia. Our host Kenneth Locovara, the paleontologist who founded the museum, opened the event with a presentation about extinction events. The fifth great extinction, when an asteroid hit near the Yucatan, wiped out seventy-five percent of life on earth, including the dinosaurs. He concluded with the message that we must change how we steward our earth—including by planting native plants—to avoid causing a sixth great extinction. (My fellow Substacker Angela Nickerson shares more about the symposium in An Invitation to a New Approach to Gardening.)
I highly recommend visiting the Edelman Fossil Park & Museum for an immersive dinosaur experience, including participating in a live dig and leaving with your own fossil. In the meantime, I will leave you with one slide from Locovara’s talk, below.
How: Propagating via hardwood cuttings
Propagation guru Ken Druse’s hardwood cuttings method is a super easy way to make more shrubs and even some trees. You can start as soon as their leaves fall and deciduous shrubs are dormant. Don’t be shy about asking friends, acquaintances, and even strangers for cuttings of their plants! The only limitation is the space in your refrigerator.
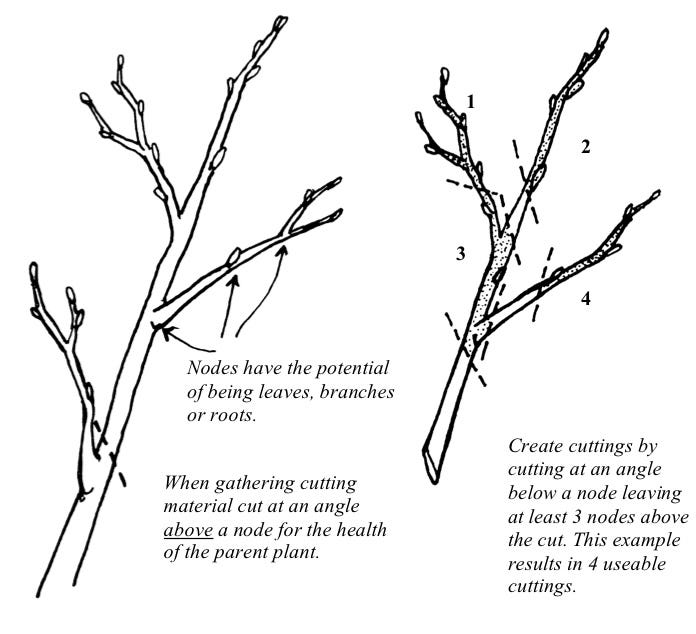
Materials: Pruners; fine marker; knife or box cutter; rooting hormone #8 (0.8 percent indole-3-butyric acid); wood or plastic box; sand; plastic bag; refrigerator.
Sharpen your pruners and wipe with alcohol.
Trim an eight to twelve-inch section of branch that grew that season, making slanted cuts just above a leaf node at the bottom and top, with at least one node in between. Immediately mark an arrow pointing up to indicate the top.
Repeat, wiping your pruners with alcohol between each cut, until you have your desired number.
With a clean box cutter, score a shallow inch-long slit through the bark at the base of each cutting without damaging the node. Bundle the scored cuttings together, lining up the bottoms. Tie them with twine if you like.
Dip the bundle briefly in root hormone; if it’s a powder, tap off the excess.
Lay the cuttings in a bed of moist sand in a box. Cover with more moist sand. Put the box in a plastic bag.
Refrigerate until spring, by when the cuttings should have formed calluses or roots. (Some root in six weeks, some six months.)
Plant in sandy soil, spaced a few inches apart, in a pot or protected bed, until they leaf out and develop deep roots.
Transplant into the soil as you would saplings.
Sample plants to propagate by woody cuttings: ashy hydrangea, aspen, beautyberry, chokeberry, cinquefoil, dogwood, elderberry, holly, honeysuckle (shrubby), mock orange, ninebark, pepperbush, poplar, smooth hydrangea, Virginia sweetspire, willow
Wow! Maintaining a meadow and grass paths
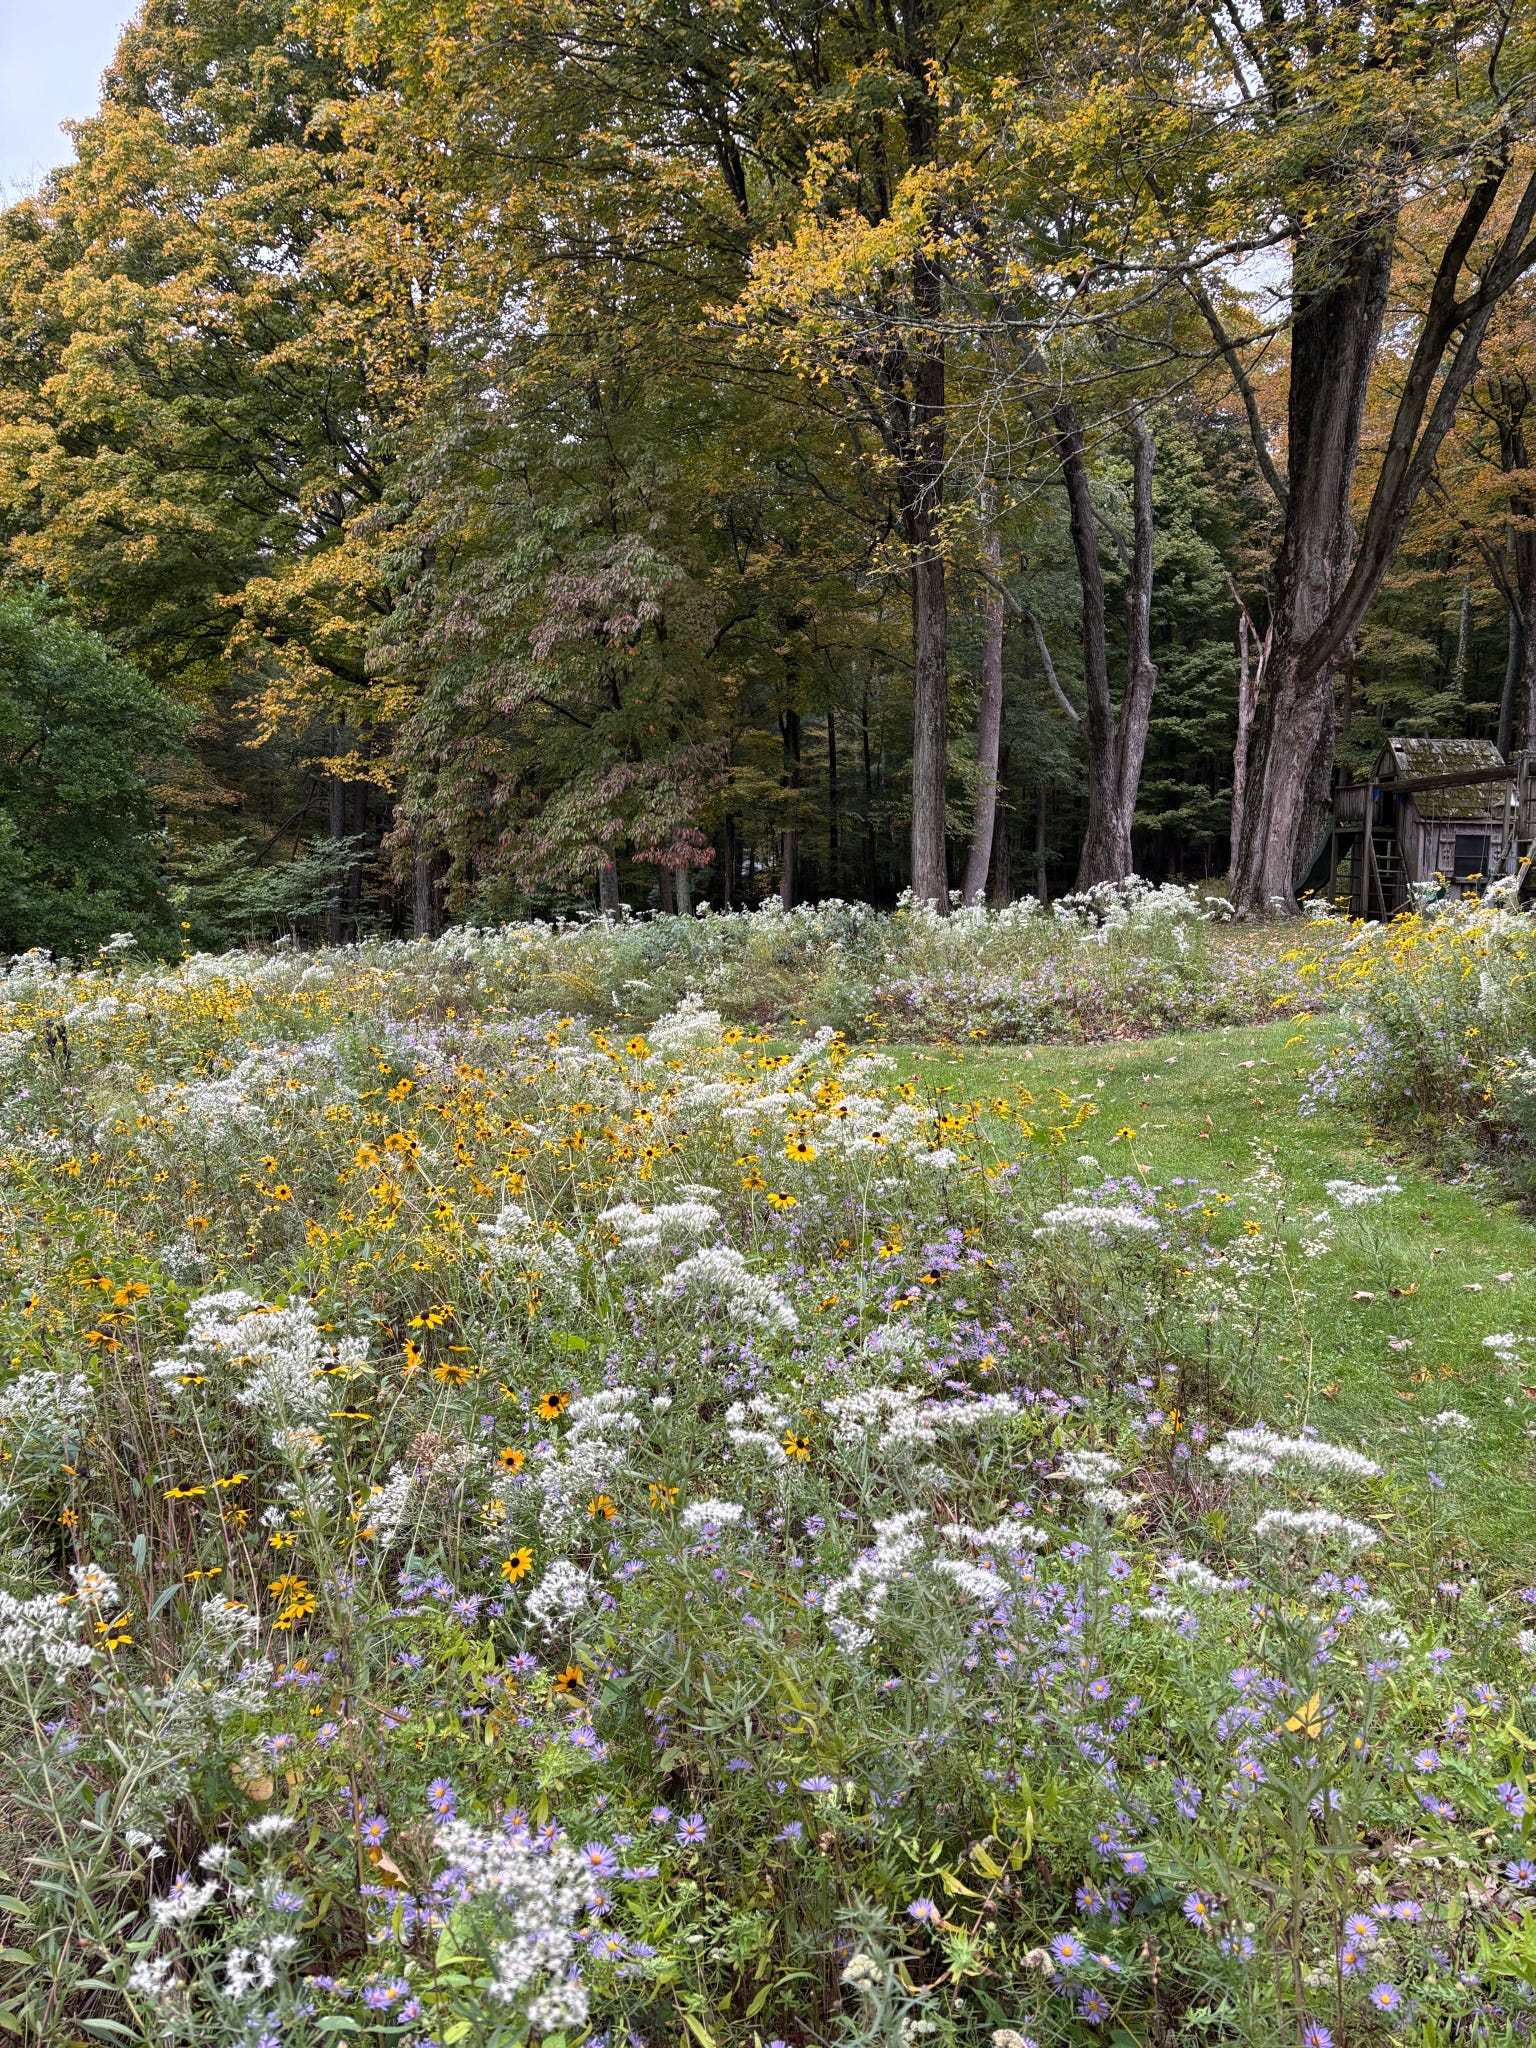
The beautiful early fall meadow below has mown paths and no edging, maintained by the Hudson Valley’s Starflower Gardens, which provides ecological garden design, land care, and coaching. Owner Claire Davis posted the picture on Substack, where she writes Weeds Walks Reads, explaining the “meadow mending” process that produced this result:
This big pollinator garden had lost many of its original plants (it turned out to be much wetter than the designer anticipated!) We spent the first season focused on keeping unwanted plants from setting seed, adding some aggressive plant friends that were better adapted to the damp conditions, and then just letting the seed bank do its thing and editing seedlings as they emerged. There are still plenty of bare spots, but I love this late summer/early fall moment.
Spending time doing stewardship/maintenance work allowed us to spot indicator species like dwarf St. John’s wort, which often grows in wetlands and on the edge of seasonally flooded pond shores, and note their locations. This guided our plant selection and placement when we added new species!—Claire Davis
When I direct messaged Davis about the edge, she responded:
Definitely no edging. … I just use a half-moon edger 2-3 times per year, and then do a little hand weeding if needed, but generally I don’t worry about the edge too much beyond early June. (After that, you can’t really see it anyway!) … I often pinch plants towards the front or around the perimeter of beds to keep them a little more compact and prevent them from flopping.
Digging Deeper
Want to support and attract bats? Check out Wild Ones’ webinar, Bats in the Backyard.
While most veggies require full sun, here’s a list from Better Homes & Gardens of fruits to grow in shade, some of which may be native to your area.
In case you ever wondered, Martha Stewart magazine explains (in detail) where bees go in winter.
Dead wood supports a thousand critters—even fish, according to this recent study of a adding dead trees to a lake.
Wildlife crossings work. Read about how North America’s largest wildlife crossing cut collisions with animals by 91%.